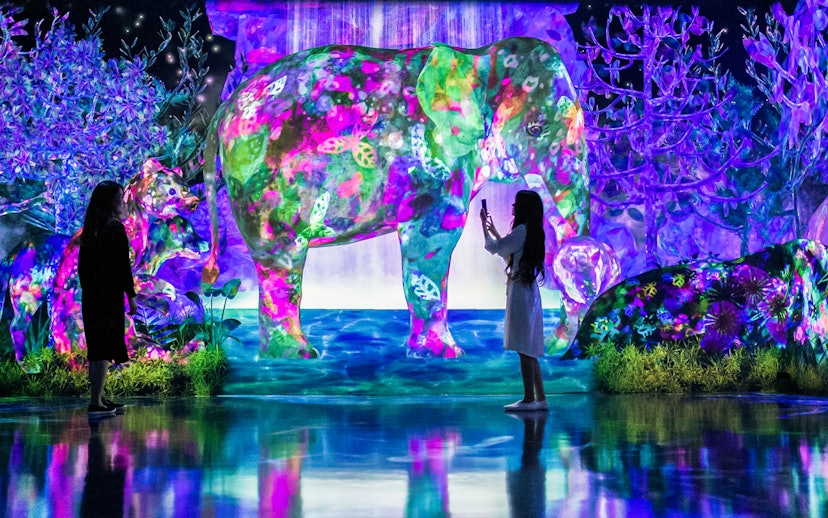
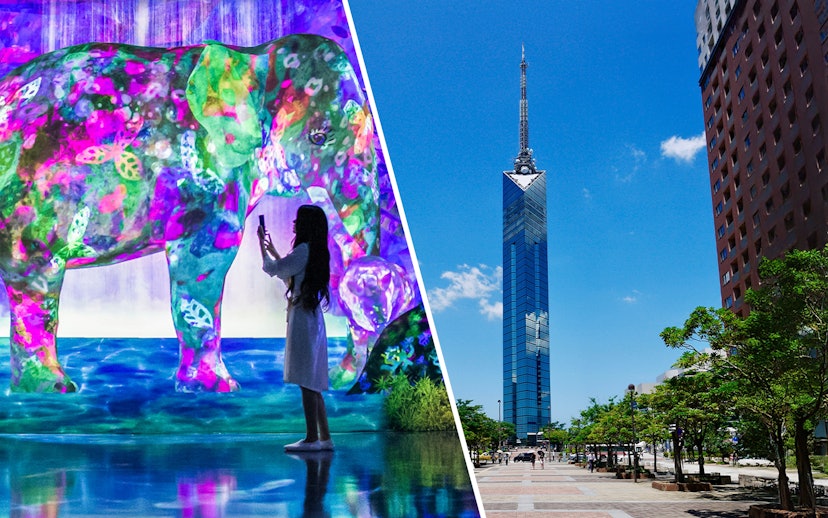
TeamLab Forest Fukuoka is an interactive digital art museum best known for turning climbing, drawing, catching animals, and moving through space into part of the artwork itself. The visit is compact but surprisingly physical, with dark rooms, uneven surfaces, and exhibits that reward active participation more than passive looking. The biggest difference between a rushed visit and a great one is arriving with enough battery, time, and energy for both main zones. This guide covers timing, tickets, layout, and the exhibits worth slowing down for.
This is a short, high-impact visit, and a little planning makes it feel much less rushed.
🎟️ Slots for teamLab Forest Fukuoka can sell out a few days in advance during summer vacation, Golden Week, and holiday periods. Lock in your visit before the time you want is gone.
The museum is inside BOSS EZO Fukuoka in the Momochi seaside area, next to PayPay Dome and around 6km west of central Hakata.
BOSS EZO Fukuoka 5F, Momochi, Chuo Ward, Fukuoka, Japan
There is one main TeamLab Forest entrance on the 5th floor of BOSS EZO Fukuoka, but visitors split into different lines depending on whether they already have a timed ticket. The mistake most people make is arriving without opening their QR code or using the restroom before entry.
When is it busiest? Weekends, Golden Week, and July–August are the hardest times to get your preferred slot, and later afternoon entries feel most crowded because family visits bunch up after lunch.
When should you actually go? The first weekday slots are noticeably calmer, giving you more room in the animal-hunt rooms and easier photo moments before the busier afternoon wave arrives.
The installations feel far less rushed in the first weekday slots, especially in the interactive projection rooms and the Bouncing Sphere Caterpillar House, where crowd flow affects how long you can explore before moving on.
| Visit type | Route | Duration | Walking distance | What you get |
|---|---|---|---|---|
Highlights only | Main projection rooms → Beating Earth → exit | 45–60 mins | ~0.5 km | Best if you mainly want to experience the signature digital installations and interactive projections without replaying the activities. |
Balanced visit | Full museum route → catching app experience → Bouncing Sphere Caterpillar House → exit | 1–1.5 hrs | ~1 km | The ideal pace for most visitors. You’ll have enough time for the interactive spaces, smartphone activities, and photo stops without rushing through the exhibits. |
Full exploration | Full museum route → replay interactive zones → extended photo stops → combo with Fukuoka Tower | 2–3+ hrs | ~1.5 km | Best if you want to revisit installations, spend longer in the interactive rooms, or combine the visit with Fukuoka Tower in the same outing. |
Most visitors spend 1–1.5 hours here. That’s enough time to explore the interactive rooms, use the catching app properly, and enjoy the projection spaces without rushing. If you’re visiting with children, replaying the activities, or taking lots of photos, closer to 2 hours feels more comfortable.
Inclusions #
Fukuoka Tower
FUKUOKA teamLab Forest
Inclusions #
Fukuoka Tower
Entry to Fukuoka Tower
Access to observation deck
FUKUOKA teamLab Forest
Entry to E・ZO FUKUOKA teamLab Forest
Access to all exhibits
| Ticket type | What's included | Best for | Price |
|---|---|---|---|
E・ZO FUKUOKA teamLab Forest ticket | Entry to the interactive digital museum with access to installations like Catching and Collecting Forest, Exercise Forest, Beating Earth, and Bouncing Sphere Caterpillar House | Exploring the immersive digital-art spaces at your own pace without adding extra sightseeing stops | From ¥2,350 |
Combo: teamLab Forest + Fukuoka Tower | teamLab Forest admission plus access to Fukuoka Tower’s observation deck | Turning the visit into a broader Fukuoka city outing with both immersive art and skyline views in the same trip | From ¥3,322 |
The layout is compact and zone-based rather than maze-like, with one main flow through the experience. It’s easy to navigate, but it’s also easy to burn too much time early and rush the more physical rooms later.
Suggested route: Start with the app-based catching rooms while your phone battery is full, slow down for Graffiti Nature before the line builds, and save your final energy for Athletics Forest because it’s the most physically demanding part of the visit.
💡 Pro tip: Download the app and open your QR ticket before you reach the 5th-floor entrance — doing both on the spot slows your entry and cuts into the first part of the experience.


Experience type: AR animal-catching game
This is the installation that sets the tone for the whole visit: instead of looking at projected animals, you actively ‘catch’ them with the app and build a digital collection as you go. Most visitors enjoy the novelty, but the detail they miss is that each captured creature unlocks information, so it works best if you pause and read rather than treating it like a race.
Where to find it: At the start of the Catching and Collecting Forest zone.
Experience type: Draw-and-scan digital ecosystem
You color your own animal, insect, or creature on paper, then watch it appear on the projected landscape and interact with other life around it. The part most people rush past is the coloring station itself — if you spend an extra few minutes making something distinctive, it’s much easier to spot once it joins the wall-sized ecosystem.
Where to find it: In the creation area between the catching rooms and the more active installations.
Experience type: Reactive movement installation
This room feels like a glowing, oversized ball pit crossed with a light show, and it’s one of the most playful parts of the museum. The spheres change color and respond to repeated movement, but many visitors don’t realize that matching colors in sequence can trigger extra visual effects, which makes the room much more fun than a quick photo stop.
Where to find it: Inside the Athletics Forest zone.
Experience type: Physical balance challenge
This installation turns your balance into part of the artwork: each step tilts, shifts, lights up, and sends sound or color through the surrounding projections. What most people miss is that slower movement creates a more controlled response, so it’s better treated like a coordination exercise than a race across the platforms.
Where to find it: In the central section of Athletics Forest.
Experience type: Motion-reactive projection
This is one of the calmest spaces in the museum, with cascading light that parts around your body as if it were real water. Visitors often skim through it on the way out, but it’s worth staying still for a moment because the visual effect is strongest when you stop moving and let the projected flow react around your silhouette.
Where to find it: Near the quieter end of the route after the more active athletics rooms.
The catching and collecting activities work best when you slow down and actually interact with the digital ecosystem rather than treating them as quick pass-through exhibits. Many visitors also move too quickly through the calmer projection rooms after the more physical interactive spaces.
This is a strong pick for children who like movement, drawing, and screens that respond to them, but it works best when they’re old enough to follow basic safety instructions in the active rooms.
Photography is allowed throughout most of the experience, and this is one of the easiest places in Fukuoka to fill your camera roll. Flash, tripods, and bulky gear are not a good fit for the dark, reactive rooms, and they can disrupt both the projections and other visitors’ photos. A phone camera works better than a full setup here, especially in the mirror-lined and low-light spaces.
Distance: 500m — 7-minute walk
Why people combine them: It’s an easy same-day pairing because TeamLab gives you an indoor, high-energy visit, while the tower adds open views and a completely different pace nearby.
✨ TeamLab Forest Fukuoka and Fukuoka Tower are most commonly visited together — and simplest to do on a combo ticket. The pairing saves you from making two separate plans and turns one short museum visit into a fuller half-day outing. → See combo options
Distance: Same building — 2-minute elevator ride or short walk
Why people combine them: It’s the most convenient add-on if you want more from BOSS EZO without changing location, especially for families or baseball fans already heading to the PayPay Dome area.
PayPay Dome
Distance: Next door — 3-minute walk
Worth knowing: If there’s a game or event on, the whole area feels livelier, but traffic and parking also get harder, so public transit becomes the smarter choice.
Momochi Seaside Park
Distance: About 700m — 10-minute walk
Worth knowing: It’s the easiest outdoor reset after a dark, high-energy museum visit, especially if you want sea air or sunset views before dinner.
Momochi is a practical base if you want a quieter waterfront area near PayPay Dome, Fukuoka Tower, and the beach. It works well for short stays built around this side of the city, but it’s less convenient than Tenjin or Hakata if nightlife, transit flexibility, or broader sightseeing is your priority. For most first-time visitors, it’s better as a half-day outing than as the default place to stay.
Most visits take 1–1.5 hours. You can stretch that closer to 2 hours if you’re visiting with children, replaying the catching game, spending extra time in Graffiti Nature, or stopping often for photos in the reactive light rooms.
Yes, booking in advance is the safer choice, especially for weekends, summer vacation, Golden Week, and holiday periods. Same-day tickets may still be available on quieter dates, but popular time slots can disappear early and you’ll have much less choice on the day.
Arriving 10–15 minutes early is usually enough. That gives you time to open your QR code, store larger bags, download or check the app, and use the restroom before entering, which matters because there are no restrooms inside the exhibit.
Yes, but keeping it small makes the visit much easier. Large bags, strollers, and awkward items should be stored in the free lockers before entry because several rooms involve bouncing, balancing, and moving through soft or uneven surfaces.
Yes, photography is allowed and this is one of the most photo-friendly attractions in Fukuoka. Flash, tripods, and bulky equipment are a poor fit for the dark projection spaces, so a phone camera or compact camera is the most practical setup.
Yes, groups can visit, and larger private arrangements may also be possible by request. Timed entry helps keep the experience manageable, but smaller groups usually move through the interactive rooms more smoothly than large ones, especially in the active zones.
Yes, it’s one of the strongest indoor family attractions in Fukuoka. Children usually love the catching game, glowing sphere rooms, and drawing-based installations, though the visit works best if they can follow basic safety instructions and handle a dark, high-sensory environment.
No, not fully. Wheelchairs are not permitted inside the exhibit because uneven surfaces and physical interaction are central to the design, so this is not a good fit for visitors who need step-free access throughout the experience.
Yes, food is easy to find in the same complex. The simplest option is to eat in the BOSS EZO food hall before or after your visit, because there’s no re-entry once you leave the exhibit.
Wear flat, stable shoes such as sneakers. This is an active museum, not a stand-and-look gallery, so loose sandals, heels, or anything slippery can make the bouncing and balance-based installations uncomfortable or unsafe.
No, re-entry is not allowed. That’s why it’s worth using the restroom, sorting lockers, and checking your phone battery before you enter, especially if you’re visiting with children.
Yes, it’s one of the best rainy-day attractions in Fukuoka because it’s fully indoors and easy to reach by bus, subway, taxi, or car. It’s especially useful when beach or city walking plans around Momochi fall apart because of bad weather.